How to Create a Zoom Meeting Link: A Step-by-Step Guide
In today’s world of remote work, virtual events, and online learning, Zoom has become a household name. Whether you’re hosting a business meeting, conducting a webinar, or catching up with friends and family, knowing how to create a Zoom meeting link is essential. This guide will walk you through the process step-by-step, ensuring you can set up your next Zoom meeting with ease.
Step 1: Sign In to Your Zoom Account
First, you need to sign in to your Zoom account. If you don’t have an account yet, you can easily sign up for free on the Zoom website.
- Go to the Zoom website (https://zoom.us/).
- Click on the “Sign In” button at the top right corner.
- Enter your email and password, or sign in using Google, Facebook, or SSO (Single Sign-On).
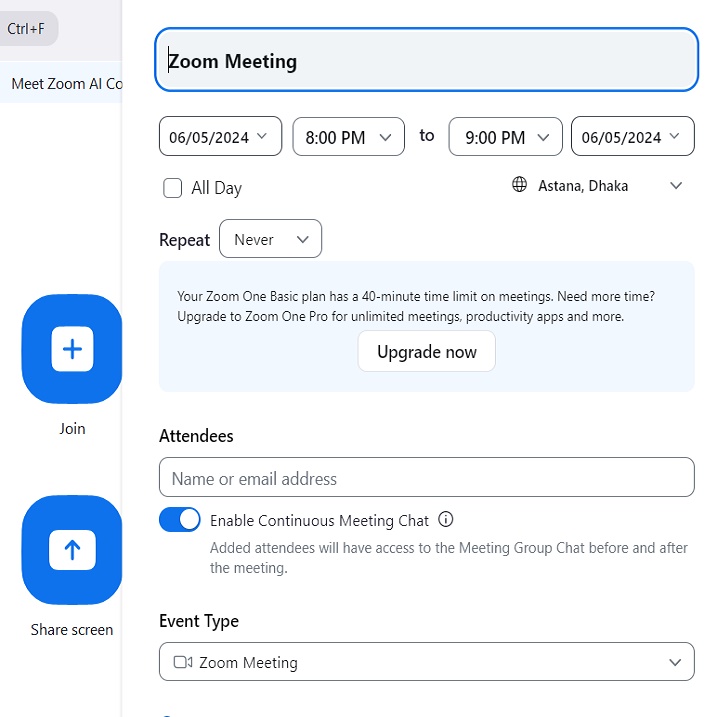
Step 2: Schedule a New Meeting
Once you’re logged in, you can schedule a new meeting.
- On the Zoom homepage, click on the “Schedule a Meeting” button located on the right side of the top menu.
- Fill in the details for your meeting:
- Topic: Enter a name for your meeting.
- Description: (Optional) Add a description for the meeting.
- When: Set the date and time for your meeting.
- Duration: Specify the length of the meeting.
- Time Zone: Ensure the correct time zone is selected.
- Recurring Meeting: Check this box if you want to create a recurring meeting.
- Registration: Choose if you want participants to register in advance.
- Meeting ID: Select “Generate Automatically” or “Personal Meeting ID” for the meeting ID.
- Passcode: You can set a passcode for added security.
- Waiting Room: Enabling this feature allows the host to control when participants join the meeting.
- Video: Choose whether the host and participants’ video will be on or off by default.
- Audio: Select “Both” to allow users to join via telephone and computer audio.
- Meeting Options: Choose additional options like enabling join before host, mute participants upon entry, and automatically record the meeting.
- Once all the details are filled out, click the “Save” button at the bottom of the page.
Step 3: Copy the Meeting Invitation
After saving your meeting, you’ll be taken to the meeting details page.
- On the meeting details page, you’ll see a section labeled “Invite Link” or “Copy the invitation”.
- Click the “Copy Invitation” button. A pop-up window will appear with the meeting details.
- Click the “Copy Meeting Invitation” button in the pop-up window to copy the meeting information, including the Zoom link, to your clipboard.
Step 4: Share the Meeting Link
Now that you have the meeting invitation copied, you can share it with your participants.
- Open your email client, messaging app, or calendar invite tool.
- Paste the copied invitation into the message or invite.
- Send the invitation to your participants.
Step 5: Start the Meeting
When it’s time for your meeting, you can start it from your Zoom account.
- Sign in to your Zoom account.
- Go to the “Meetings” tab on the left sidebar.
- Find the meeting you scheduled and click the “Start” button next to it.
Alternatively, you can start the meeting by clicking the meeting link in the invitation you sent out.
Additional Tips
- Use Zoom’s Desktop App: For an enhanced experience, consider using the Zoom desktop app, which offers more features and a more stable connection.
- Test Your Equipment: Before the meeting, test your microphone, speakers, and camera to ensure everything is working properly.
- Security Settings: Familiarize yourself with Zoom’s security settings, like waiting rooms and passcodes, to keep your meetings secure.